 English
 Română
How to use Django Context Processors
How to use Django Context Processors
Introduction
Django is a very powerful Python library used to create web applications. If you have heard about Django, you might have heard the term "Batteries Included". What that means is that Django comes with a set of built-in tools for developers to use right away to build complex applications. One of the tools we are going to explore today is Django Context Processors. These are functions that allow you to inject variables and data into the context of every template rendered in your Django application automatically without having to manually add process context in each view. This is extremely handy when you need to display common information across all pages of your website, such as the current user's information, site settings, navigation menus, or any other data that should be globally accessible without having to manually pass it from every single view. This makes your code cleaner, more maintainable, and follows the DRY (Don't Repeat Yourself) principle.
In this tutorial, we will explore how context processors work, how to create your own custom context processors, and how to use them effectively in your Django templates. This knowledge will serve as a foundation that you can apply to your own projects to make your Django applications more efficient and organized.
For this tutorial, I will make a couple assumptions so that I can provide the exact commands (given the known folder structure inside the sandbox):
- You are executing this code in Web Development Sandbox on Bytestark.com
- You are using the existing Django example in the /examples/django_sample_1 folder.
- Your starting folder when you open the Web Development Sandbox is /home/coder/learning. When paths are referenced, they will be relative to this root path.
Understanding Context Processors
Before we dive into creating our own context processors, let's first understand what they are and how they work.
Context processors are Python functions that take an HttpRequest object as their argument and return a dictionary of variables that will be merged into the context of every template rendered in your Django application. This means that any variable you return from a context processor will be automatically available in all of your templates without you having to pass it explicitly from your views.
Django comes with several built-in context processors that are enabled by default. Let's open the settings.py file located at /examples/django_sample_1/django_sample_1/settings.py and examine the context processor configuration.
Search for the setting called TEMPLATES. Inside this setting, you'll find a list called context_processors within the OPTIONS dictionary. It should look something like this:
TEMPLATES = [
    {
        'BACKEND': 'django.template.backends.django.DjangoTemplates',
        'DIRS': [],
        'APP_DIRS': True,
        'OPTIONS': {
            'context_processors': [
                'django.template.context_processors.debug',
                'django.template.context_processors.request',
                'django.contrib.auth.context_processors.auth',
                'django.contrib.messages.context_processors.messages',
            ],
        },
    },
]
There are some context processors that Django includes by default:
- django.template.context_processors.debug - Adds debugging information to the context when DEBUG is True.
- django.template.context_processors.request - Adds the current
requestobject to the context, making it accessible in templates. - django.contrib.auth.context_processors.auth - Adds the current user and permissions information to the context.
- django.contrib.messages.context_processors.messages - Adds messages from the Django messages framework to the context.
With the understanding of what context processors are and which ones are enabled by default, let's create our own custom context processor.
Creating a Custom Context Processor
For this tutorial, we'll create a context processor that provides site-wide information such as the site name, the current year (useful for copyright notices), and a list of social media links that we want to display in the footer of every page. This is a common use case for context processors since this type of information typically appears on every page of a website and usually does not change.
First, let's create a new file to hold our context processors. It's a common convention to create a file called context_processors.py in your Django app. Let's create this file in the home app directory.
Create a new file at /examples/django_sample_1/home/context_processors.py and add the following code:
from datetime import datetime

def site_info(request):
    """
    Context processor that provides site-wide information.
    """
    return {
        'site_name': 'Django Demo Site',
        'current_year': datetime.now().year,
        'social_links': {
            'twitter': 'https://twitter.com/example',
            'github': 'https://github.com/example',
            'linkedin': 'https://linkedin.com/company/example',
        }
    }
Let's break down what this code does:
- We import
datetimeto get the current year dynamically. - We define a function called
site_infothat takesrequestas a parameter. All context processors must accept the request object as their first argument, even if they don't use it. - The function returns a dictionary with three keys:
site_name,current_year, andsocial_links. These variables will now be available in all of our templates.
Note: The dictionary keys you return from your context processor will become variable names in your templates, so choose meaningful and descriptive names that won't conflict with existing template variables.
Registering the Context Processor
Now that we've created our context processor, we need to register it in our Django settings so that Django knows to use it. Open the settings.py file again and locate the TEMPLATES setting. We need to add our new context processor to the context_processors list.
Update the context_processors list to include our custom context processor:
TEMPLATES = [
    {
        'BACKEND': 'django.template.backends.django.DjangoTemplates',
        'DIRS': [],
        'APP_DIRS': True,
        'OPTIONS': {
            'context_processors': [
                'django.template.context_processors.debug',
                'django.template.context_processors.request',
                'django.contrib.auth.context_processors.auth',
                'django.contrib.messages.context_processors.messages',
                'home.context_processors.site_info',  # <--- Our custom context processor
            ],
        },
    },
]
The path to our context processor follows the format: app_name.module_name.function_name. In our case, it's home.context_processors.site_info.
Note: The order of context processors can matter if you have dependencies between them. Generally, it's safe to add your custom context processors at the end of the list.
Using Context Processor Variables in Templates
Now that we've created and registered our context processor, let's use the variables it provides in our templates. Open the file /examples/django_sample_1/home/templates/home/home.html and replace its content with the following code:
<!DOCTYPE html>
<html>
<head>
<meta charset="UTF-8">
<title>{{ site_name }} - Home</title>
<style>
* {
margin: 0;
padding: 0;
box-sizing: border-box;
}
body {
font-family: Arial, sans-serif;
display: flex;
flex-direction: column;
min-height: 100vh;
}
.header {
background-color: #333;
color: white;
padding: 20px;
text-align: center;
}
.header h1 {
font-size: 28px;
}
.container {
flex: 1;
padding: 40px 20px;
max-width: 800px;
margin: 0 auto;
width: 100%;
}
.content {
background-color: #f4f4f4;
padding: 30px;
border-radius: 8px;
margin-bottom: 20px;
}
.content h2 {
margin-bottom: 15px;
color: #333;
}
.content p {
line-height: 1.6;
color: #666;
}
.footer {
background-color: #333;
color: white;
padding: 30px 20px;
text-align: center;
}
.footer-content {
max-width: 800px;
margin: 0 auto;
}
.social-links {
margin: 20px 0;
display: flex;
justify-content: center;
gap: 20px;
}
.social-links a {
color: white;
text-decoration: none;
padding: 10px 20px;
background-color: #555;
border-radius: 5px;
transition: background-color 0.3s;
}
.social-links a:hover {
background-color: #777;
}
.copyright {
margin-top: 20px;
font-size: 14px;
color: #aaa;
}
</style>
</head>
<body>
<div class="header">
<h1>Welcome to {{ site_name }}</h1>
</div>
<div class="container">
<div class="content">
<h2>About This Demo</h2>
<p>
This page demonstrates the use of Django context processors.
Notice how the site name "{{ site_name }}" appears both in the title
and in the header without being explicitly passed from the view.
The footer also displays the current year and social media links,
all provided by our custom context processor.
</p>
</div>
<div class="content">
<h2>How It Works</h2>
<p>
Context processors are functions that automatically inject variables
into the context of every template. This means you can access these
variables anywhere in your templates without having to pass them from
every single view function.
</p>
</div>
</div>
<footer class="footer">
<div class="footer-content">
<h3>Connect With Us</h3>
<div class="social-links">
<a href="{{ social_links.twitter }}" target="_blank">Twitter</a>
<a href="{{ social_links.github }}" target="_blank">GitHub</a>
<a href="{{ social_links.linkedin }}" target="_blank">LinkedIn</a>
</div>
<div class="copyright">
© {{ current_year }} {{ site_name }}. All rights reserved.
</div>
</div>
</footer>
</body>
</html>
Now let's start the Django development server to see our context processor in action. Run the following command:
python3 manage.py runserver
Note: If you haven't changed the directory to Django project you need to change the working directory using the following command:
cd examples/django_sample_1
This will start the development server and VSCode will display a pop-up message that our website is accessible and whether we want to open it. Click to open.
Your homepage should now display the site name in the header and the social links in the footer, along with the current year for the copyright notice, all without explicitly passing these variables from the view.
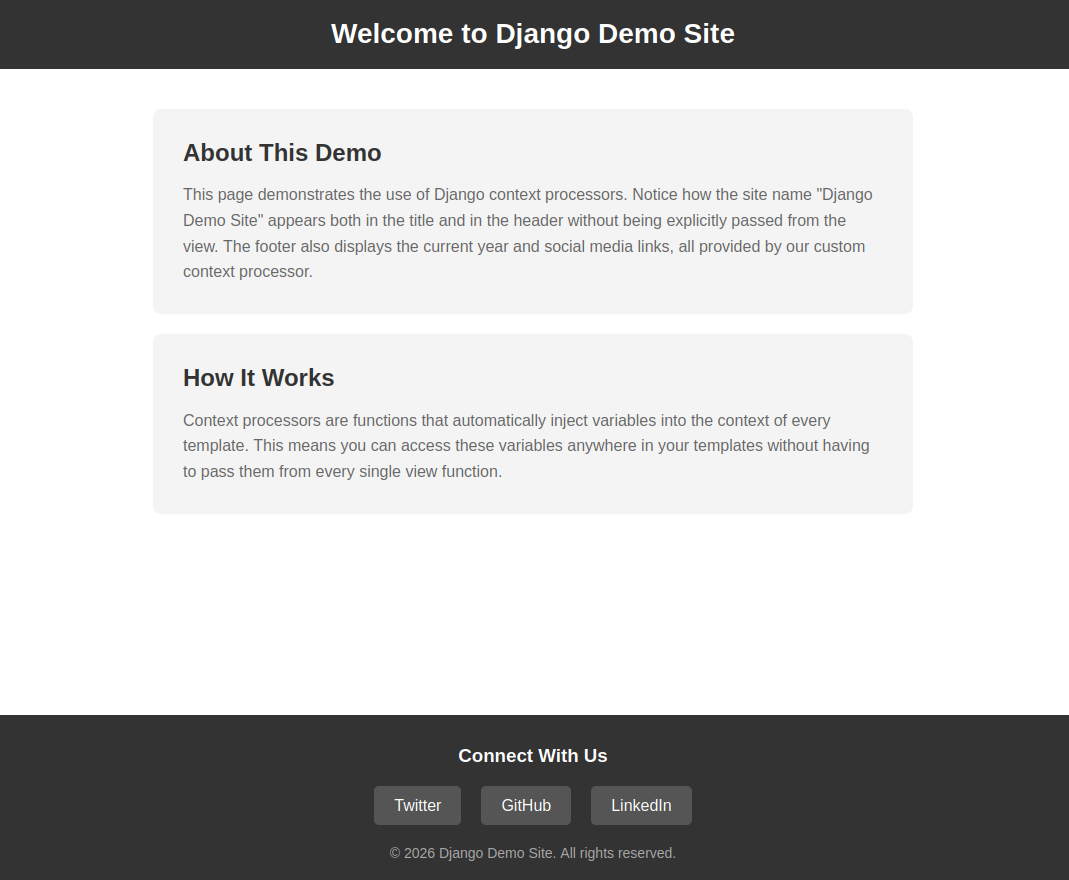
As you can see, we can now use {{ site_name }}, {{ current_year }}, and {{ social_links }} anywhere in our template without having to modify our view function. This is the power of context processors!
Creating a Dynamic Context Processor
Let's create a more advanced context processor that demonstrates how to work with dynamic data. We'll create a context processor that checks if the user is authenticated and provides user-specific information, as well as a list of recent notifications. This is a common pattern in web applications where you want to display user-specific data in the navigation bar or sidebar on every page.
Add the following function to your /examples/django_sample_1/home/context_processors.py file:
def user_info(request):
    """
    Context processor that provides user-specific information.
    """
    context = {
        'is_authenticated': request.user.is_authenticated,
        'notifications_count': 0,
        'user_display_name': 'Guest',
    }

    if request.user.is_authenticated:
        context['user_display_name'] = request.user.username
        # In a real application, you might query the database for actual notifications
        # For this demo, we'll just use a placeholder value
        context['notifications_count'] = 3

    return context
Now register this new context processor in settings.py by adding it to the context_processors list:
'context_processors': [
    'django.template.context_processors.debug',
    'django.template.context_processors.request',
    'django.contrib.auth.context_processors.auth',
    'django.contrib.messages.context_processors.messages',
    'home.context_processors.site_info',
    'home.context_processors.user_info',  # Our new dynamic context processor
],
Now let's update our template to use these new variables. Update the header section in home.html:
<div class="header">
    <div style="display: flex; justify-content: space-between; align-items: center; max-width: 800px; margin: 0 auto;">
        <h1>Welcome to {{ site_name }}</h1>
        <div style="color: white;">
            {% if is_authenticated %}
                <span>Hello, {{ user_display_name }}!</span>
                {% if notifications_count > 0 %}
                    <span style="background-color: #ff5722; padding: 2px 8px; border-radius: 10px; margin-left: 10px; font-size: 12px;">
                        {{ notifications_count }} new
                    </span>
                {% endif %}
            {% else %}
                <span>Welcome, {{ user_display_name }}!</span>
            {% endif %}
        </div>
    </div>
</div>
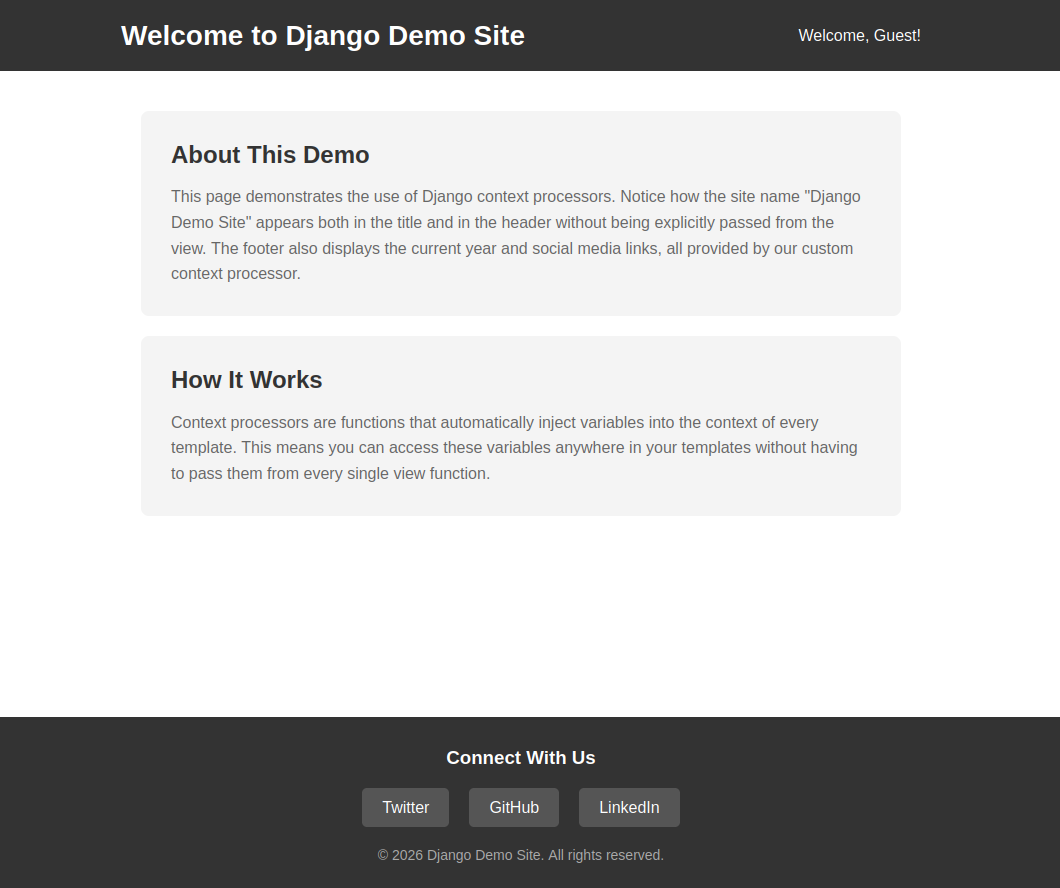
Refresh your browser and you should now see "Welcome, Guest!" in the header since no user is logged in. If you were to log in through the Django admin interface, you would see your username and the notification count instead.
Using Context Processors with Database Queries
Context processors can also be used to fetch data from the database that you want available across all templates.
Important : You need to be careful with this approach because context processors are called for every template that's rendered, which means any database queries in your context processor will be executed on every page load. Let's create an example that demonstrates both the power and the potential pitfalls of this approach.
Add the following function to your context_processors.py file:
from django.core.cache import cache


def navigation_menu(request):
    """
    Context processor that provides navigation menu items.
    Uses caching to avoid hitting the database on every request.
    """
    # Try to get the menu from cache first
    menu_items = cache.get('navigation_menu')

    if menu_items is None:
        # In a real application, this might be a database query
        # For this demo, we'll use a static list
        menu_items = [
            {'name': 'Home', 'url': '/'},
            {'name': 'About', 'url': '/about/'},
            {'name': 'Services', 'url': '/services/'},
            {'name': 'Contact', 'url': '/contact/'},
        ]
        # Cache the menu for 1 hour (3600 seconds)
        cache.set('navigation_menu', menu_items, 3600)

    return {
        'navigation_menu': menu_items,
    }
Note: This example demonstrates an important best practice: when using context processors to fetch data that doesn't change frequently, always use caching to avoid unnecessary database queries on every request. Without caching, you could significantly slow down your application.
Register this context processor in settings.py:
'context_processors': [
    'django.template.context_processors.debug',
    'django.template.context_processors.request',
    'django.contrib.auth.context_processors.auth',
    'django.contrib.messages.context_processors.messages',
    'home.context_processors.site_info',
    'home.context_processors.user_info',
    'home.context_processors.navigation_menu',  # Our cached context processor
],
Now update the header in your home.html template to include the navigation menu:
<div class="header">
    <div style="max-width: 800px; margin: 0 auto;">
        <div style="display: flex; justify-content: space-between; align-items: center; margin-bottom: 15px;">
            <h1>Welcome to {{ site_name }}</h1>
            <div style="color: white;">
                {% if is_authenticated %}
                    <span>Hello, {{ user_display_name }}!</span>
                    {% if notifications_count > 0 %}
                        <span style="background-color: #ff5722; padding: 2px 8px; border-radius: 10px; margin-left: 10px; font-size: 12px;">
                            {{ notifications_count }} new
                        </span>
                    {% endif %}
                {% else %}
                    <span>Welcome, {{ user_display_name }}!</span>
                {% endif %}
            </div>
        </div>
        <nav style="display: flex; gap: 20px; justify-content: center; padding-top: 10px; border-top: 1px solid #555;">
            {% for item in navigation_menu %}
                <a href="{{ item.url }}" style="color: white; text-decoration: none; padding: 5px 10px;">
                    {{ item.name }}
                </a>
            {% endfor %}
        </nav>
    </div>
</div>
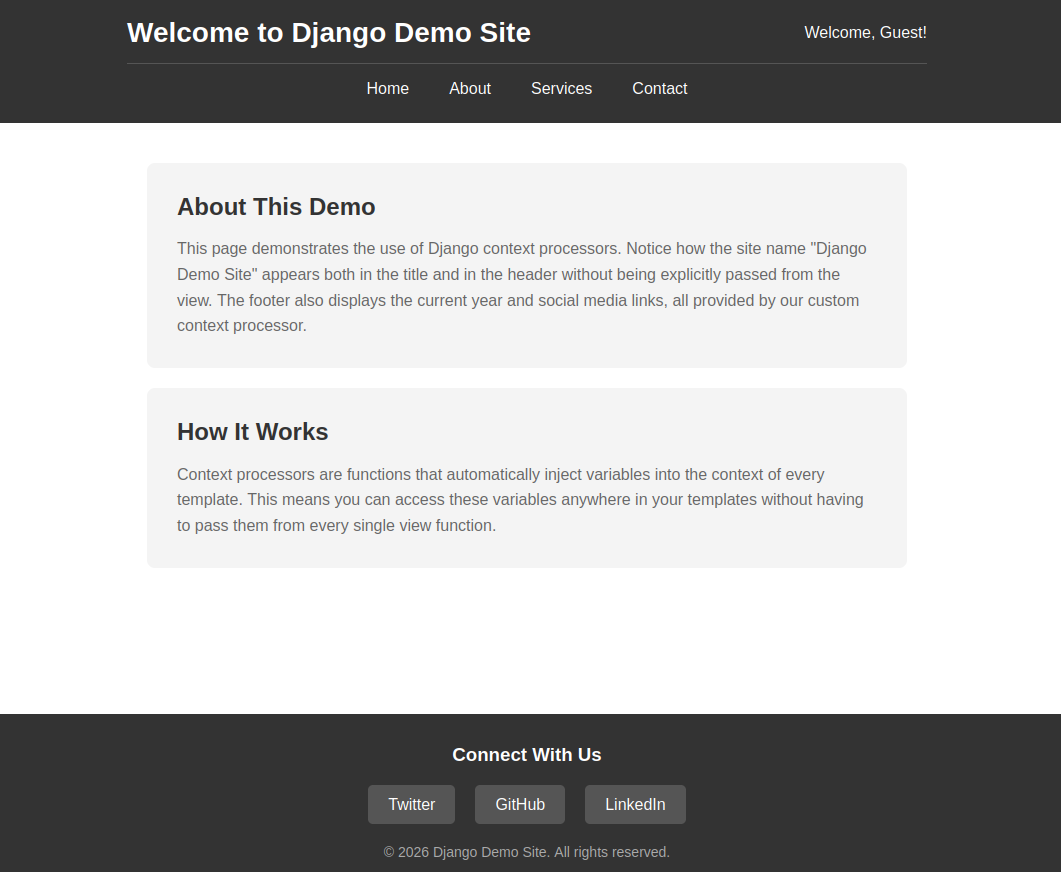
Refresh your browser and you should now see a navigation menu in the header that's automatically available on this page and would be available on any other page in your application without having to pass it from every view.
Best Practices and Performance Considerations
When working with context processors, there are several best practices you should follow to ensure your application remains performant and maintainable:
1. Keep Context Processors Lightweight
Remember that context processors are executed for every template that's rendered. If you have heavy computations or complex database queries in your context processors, they will slow down every single page load. Only include data that you truly need on most or all pages.
2. Use Caching Wisely
As demonstrated in our navigation menu example, use Django's caching framework to cache data that doesn't change frequently. This can dramatically improve performance, especially for data that requires database queries.
3. Avoid Name Conflicts
Choose unique and descriptive names for your context variables to avoid conflicts with variables passed from views or other context processors. A good practice is to namespace your variables, for example, using a dictionary: {'site': {'name': 'My Site', 'year': 2026}} instead of flat variables.
4. Consider Template Inclusion Tags as an Alternative
If you only need certain data on specific pages, consider using Django's template inclusion tags instead of context processors. Context processors should be reserved for truly global data.
5. Document Your Context Processors
Make sure to document what each context processor provides and why it exists. This helps other developers (and your future self) understand what global variables are available in templates.
Summary
In this tutorial, we have explored Django context processors and how they can be used to make data globally available across all templates in your Django application. We covered the following key concepts:
- What context processors are and how they work
- How to create custom context processors for static site information
- How to register context processors in Django settings
- How to use context processor variables in templates
- Creating dynamic context processors that work with user data
- Using caching with context processors to improve performance
- Best practices for writing efficient and maintainable context processors
- How to test your context processors
Context processors are a powerful tool in Django that can significantly reduce code duplication and make your templates cleaner and more maintainable. However, it's important to use them wisely and always keep performance in mind. As you build more complex Django applications, you'll find many opportunities to use context processors to streamline your code and improve the developer experience.
There are more advanced topics related to context processors that we didn't cover in this tutorial, such as creating context processors that depend on other context processors, or using context processors in conjunction with Django's caching framework for complex scenarios. However, this tutorial should provide you with a solid foundation to start using context processors effectively in your own projects.